
There’s something special about a dessert that’s both quick and irresistible. For me, that’s exactly what my brownie bites recipe delivers. Imagine rich, fudgy chocolate treats that are ready in under 30 minutes—perfect for satisfying any sweet craving.
I love how this recipe simplifies everything. Using a mini muffin pan and a microwave-safe bowl, you can mix and bake in no time. The best part? It’s all done in one bowl, so cleanup is a breeze.
What makes these brownie bites recipe truly special is their texture. Each bite-sized piece is packed with intense chocolate flavor and a fudgy center that’s hard to resist. Plus, they’re made with simple pantry staples like unsalted butter, cocoa powder, and vanilla extract.
Whether you’re a chocolate lover or just looking for a quick dessert, this brownie bites recipe promises homemade perfection without the hassle. Let’s dive into how to make these irresistible treats that are sure to disappear in minutes!
Introduction and Recipe Inspiration
Creating something delicious doesn’t always have to be complicated. My journey with these chocolate treats began when my kids fell in love with store-bought bite-sized brownies. I wanted to create a homemade version that was just as irresistible but made with simple ingredients I already had on hand.
My Story Behind These Brownie Bites Recipe
These brownie bites are more than just a dessert; they’re a family project. My kids and I experimented with different ingredients and tools until we found the perfect combination. The inspiration came from my favorite one-bowl fudge brownie recipe, which I adapted to create these mini treats.
- We started by using a mini muffin pan to achieve the perfect size.
- Adding chocolate chips gave an extra burst of flavor in each bite.
- Keeping the ingredients simple was key—just like the original cookie recipes I grew up with.
The result? A homemade dessert that’s quick to make and fun to share. These brownie bites are perfect for satisfying a sweet tooth or as a treat for friends and family. Let’s dive into the story behind this easy and delicious recipe.
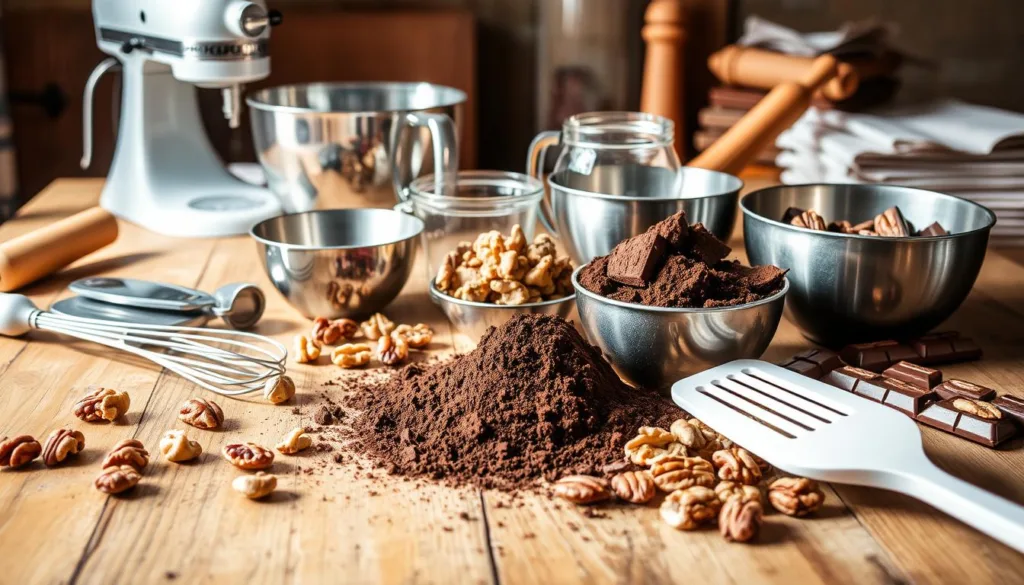
Essential Ingredients and Must-Have Tools For A Perfect Brownie Bites Recipe
Creating delicious treats like these chocolate bites starts with the right ingredients and tools. Quality matters, especially when it comes to achieving that perfect chocolate flavor.
Key Ingredients for a Rich Chocolate Flavor
For the best results, I use unsalted butter for its creamy texture and semi-sweet chocolate chips for an intense burst of flavor. High-quality cocoa powder is a must, as it forms the backbone of the chocolate taste. Other essentials include granulated sugar, eggs, and a touch of salt to balance the sweetness.
All-purpose flour and pure vanilla extract round out the ingredients, ensuring a moist and well-balanced texture. Each component plays a vital role in creating the perfect treat.
Important Kitchen Tools I Use
To make the process seamless, I rely on a few key tools. A mini muffin pan is essential for achieving the perfect bite-sized shape. A microwave-safe mixing bowl makes melting ingredients easy, while a whisk and spatula handle the mixing and pouring.
These tools not only simplify the process but also ensure even baking and a professional finish. They’re my go-to companions in the kitchen!
Easy Step-by-Step Instructions
Ready to create these irresistible treats? Let’s break down the process into simple, easy-to-follow steps. From prepping your tools to baking perfection, every detail matters to ensure your chocolate bites turn out fudgy and delicious.
Preheat and Prepare Your Oven and Pan
Start by preheating your oven to 350°F. Lightly spray a mini muffin pan with non-stick cooking spray to ensure your treats will release easily after cooling. This step is crucial for achieving perfectly formed bites without any sticking.
Mixing, Baking, and Cooling for Fudgy Perfection
In a microwave-safe bowl, combine 1 cup of unsalted butter and 1 cup of semi-sweet chocolate chips. Heat in 30-second increments, whisking each time, until smooth. Be careful not to overheat, as this can cause the chocolate to burn.
Once melted, stir in 1 cup of granulated sugar, 2 eggs, and 1 teaspoon of vanilla extract. In a separate bowl, whisk together 1 cup of all-purpose flour, 1/2 cup of cocoa powder, and 1/4 teaspoon of salt. Gently fold the dry ingredients into the chocolate mixture until just combined. Avoid overmixing to maintain that fudgy texture.
Divide the batter evenly among the mini muffin cups, filling each about 2/3 full. Bake for 10-12 minutes, or until the edges are set but the centers are still slightly soft. Rotate the pan halfway through baking for even cooking.
Let the bites cool in the pan for 5 minutes before transferring them to a wire rack to cool completely. This cooling step ensures they retain their shape and fudginess.
Delicious Brownie Bites Recipe: My Personal Twist
When it comes to my brownie bites, I love adding my own special touches to make them truly unique. Over the years, I’ve experimented with subtle ingredient tweaks that elevate these treats to a whole new level of deliciousness.
One of my favorite additions is a swirl of cream cheese frosting. It adds a tangy contrast to the rich, fudgy base, creating a delightful flavor combination. I also like to enhance the chocolate flavor by using high-quality cocoa powder and adding a pinch of extra vanilla extract for depth.
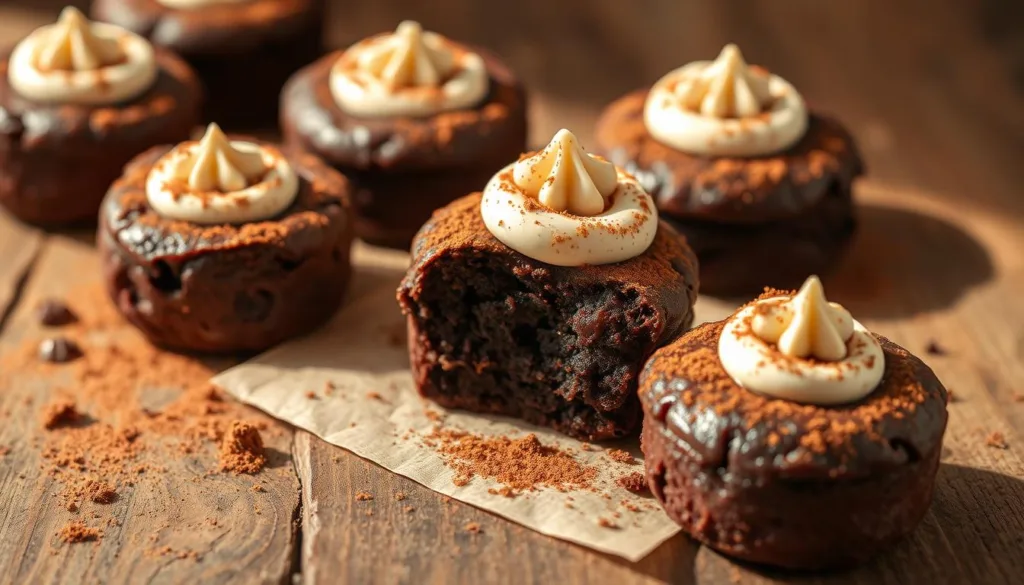
The beauty of this recipe lies in its flexibility. Feel free to get creative by adding a handful of chocolate chips for an extra burst of flavor or a sprinkle of sea salt for a touch of sophistication. The key is to maintain the fudgy texture by avoiding overmixing and not overbaking.
These brownie bites are more than just a dessert; they’re a canvas for your creativity. Whether you’re adding a drizzle of caramel or a sprinkle of chopped nuts, every tweak makes them a little more special. So, don’t be afraid to experiment and make this recipe your own signature treat!
Creative Twists & Variations
Take your treats to the next level with these creative ideas! Whether it’s for a special occasion or just to mix things up, these twists will make your chocolate bites truly unique.
Frosting Ideas and Topping Options
Add a tangy contrast with a simple cream cheese frosting. It not only looks great but also complements the rich chocolate flavor perfectly. For an extra burst, sprinkle some chocolate chips on top before the frosting sets.
Holiday and Seasonal Decorating Tips
Make your treats festive! Use pumpkin candies for Halloween, peppermint frosting for Christmas, or sprinkles for birthdays. These decorations add a fun touch without overpowering the chocolate flavor.
- Cream cheese frosting for a tangy twist
- Chocolate chips for an extra burst of flavor
- Pumpkin candies for Halloween
- Peppermint frosting for Christmas
- Sprinkles for birthdays
These ideas let you customize your bites for any occasion, making them perfect for celebrations or casual gatherings. The base recipe is versatile, so don’t hesitate to experiment and make it your own!
FAQ For Brownie Bites Recipe
How do I store homemade brownie bites to keep them fresh?
Store them in an airtight container at room temperature for up to 3 days or refrigerate for up to 5 days. For longer storage, freeze them for up to 2 months and thaw when needed.
Can I use a regular muffin pan instead of a mini muffin pan?
Yes, but the baking time will increase. A regular muffin pan will yield larger brownie bites, so bake for about 15-20 minutes instead of 8-10 minutes.
What makes these brownie bites fudgy versus cakey?
Using unsalted butter, a generous amount of cocoa powder, and not overbaking ensures a fudgy texture. Avoid overmixing the batter to keep them rich and moist.
Can I substitute all-purpose flour with another type of flour?
While all-purpose flour works best, you can try using whole wheat flour for a nuttier flavor or gluten-free flour for dietary needs. Just ensure the ratio stays consistent.
How do I know when the brownie bites are fully baked?
They’re done when the edges are set but the centers are still slightly soft. A toothpick inserted should come out with a few moist crumbs, not wet batter.
Conclusion
With this simple and quick chocolate treat recipe, you can enjoy rich, fudgy goodness in just minutes. The best part? It’s made with basic ingredients and minimal effort, making it perfect for any occasion.
I hope you’ve enjoyed this journey through my brownie recipe as much as my family and I have. Don’t forget to share your creations on Instagram and let me know how they turn out—I’d love to see your pan of freshly baked treats!
Whether it’s a spontaneous dessert craving or a special gathering, these bite-sized delights are sure to impress. Thanks for reading, and happy baking!