There’s just something magical about homemade granola, isn’t there? It’s not only perfectly crunchy but also strikes just the right balance between sweet and savory. Plus, it’s totally customizable to fit all your cravings. But here’s the real kicker—store-bought granola simply can’t compete with the fresh, flavorful goodness you get from making your own. And that’s exactly where this vanilla nut granola recipe comes into play. Whether you’re sprinkling it over your morning yogurt, adding it to a smoothie bowl, or grabbing a handful for a quick snack, this recipe is guaranteed to keep you hooked.
What’s Coming Up:
- Why homemade granola is absolutely worth the hype (and how it helps you save money along the way!).
- A detailed breakdown of the essential ingredients, along with helpful tips on selecting the very best vanilla extract to elevate your granola.
- Clear, step-by-step instructions to ensure you create the perfect, crunchy, golden granola every single time.
- Pro tips designed to help you avoid common mistakes, such as overbaking your granola or skipping the crucial cooling process.
- Creative and fun ways to enjoy your granola, ranging from layering it in yogurt parfaits to sprinkling it on refreshing smoothie bowls.
Let’s dive in and make some kitchen magic happen!
Why Make Homemade Vanilla Nut Granola Recipe?
Health Benefits of Homemade Vanilla Nut Granola Recipe
When you make granola at home, you’re in complete control of every single ingredient that goes into it. For instance, if you want less sugar, it’s an easy fix that you can adjust right away. Similarly, if you need it to be gluten-free, there’s absolutely no problem making that happen. Additionally, you get to avoid all those sneaky preservatives and artificial flavors that often hide in store-bought options. Ultimately, it’s a win-win situation—not just for your taste buds but also for your overall health
Cost Savings: Store-Bought vs. DIY
Have you ever noticed how a tiny bag of granola can end up costing just as much as an entire grocery haul? Well, that’s exactly where making it yourself becomes a total game-changer. Not only is it significantly more affordable, but it also allows you to buy ingredients in bulk, which saves even more money in the long run. Furthermore, you can completely customize the mix to include exactly what you love and leave out anything you don’t. On top of that, homemade granola delivers that gourmet, luxury feel—without the hefty price tag attached. All in all, it’s a win on every level!
Customization: Make It Your Own
his is where the fun really begins, and the possibilities are endless! If you love it extra nutty, you can go ahead and toss in almonds, pecans, or even hazelnuts for that satisfying crunch. On the other hand, if you’re craving a fruity twist, you can easily add dried cranberries, raisins, or even some chopped apricots for a touch of natural sweetness. Furthermore, the true beauty of this vanilla nut granola recipe lies in its versatility—it’s like a blank canvas that you can effortlessly customize to perfectly match your taste. And let’s not forget one of the best parts: the incredible aroma. Before you know it, your house will smell just like a cozy bakery. Honestly, you’re welcome!
Essential Ingredients for Vanilla Nut Granola Recipe
Let’s dive right into the heart of any great granola recipe: the ingredients. To begin with, you’ll need just a handful of pantry staples, which, when paired with a dash of creativity, can come together to create something truly special. In fact, with these simple components, you can whip up a batch of crunchy, flavorful granola that not only matches but even rivals anything you’d find at the store. So, without further ado, here’s the full scoop on what you’ll need to get started!
Key Ingredients: Oats, Nuts, and Sweeteners
- Old-Fashioned Oats
The backbone of granola! Stick with old-fashioned rolled oats—they bake up beautifully and hold their shape. Avoid quick oats (they’ll turn mushy) and steel-cut oats (too tough for this recipe). - Nuts
Here’s where the magic happens! Almonds, walnuts, pecans, or even cashews add crunch and richness. Chop them roughly or leave them whole for big, satisfying bites. - Sweeteners
A touch of sweetness ties it all together. Maple syrup or honey are perfect choices for that golden-brown glaze. Want to mix things up? Try agave nectar or coconut sugar.
The Star of the Show: Vanilla Extract
Vanilla extract is, without question, the ingredient that truly makes this granola shine. To achieve the best results, it’s absolutely essential to choose high-quality pure vanilla extract rather than settling for the imitation version—and here’s why. Not only does the rich, aromatic flavor add a luxurious touch, but it also effortlessly transforms your granola from something simple into bakery-level perfection. Furthermore, the depth and warmth of real vanilla enhance every other ingredient in the recipe, tying all the flavors together beautifully. In short, this one ingredient makes all the difference, so whatever you do, don’t skip it!
💡 Pro Tip: If you’re feeling adventurous, try vanilla bean paste for an even bolder vanilla flavor. It adds those gorgeous little flecks of vanilla seeds throughout your granola.
Optional Add-ins for Extra Flavor
Here’s where you can let your creativity shine. Consider these add-ins to make your granola one-of-a-kind:
- Dried Fruit: Raisins, cranberries, or dried apricots for a chewy texture.
- Seeds: Sunflower seeds or chia seeds for a nutrient boost.
- Spices: A pinch of cinnamon or nutmeg to complement the vanilla.
- Coconut Flakes: Adds a tropical vibe and a little extra crunch.
- Chocolate Chips: Because why not? Add these after the granola cools so they don’t melt.
Ingredient Ratios for Perfect Vanilla Nut Granola Recipe
A good rule of thumb for granola is:
- 3 cups of oats
- 1 to 1 ½ cups of nuts/seeds
- ½ cup of sweetener
- ¼ cup of oil (like coconut or vegetable oil)
- 2 teaspoons of vanilla extract
This ratio keeps the granola crispy, flavorful, and not overly sweet.
Step-by-Step Instructions for Perfect Vanilla Nut Granola Recipe
Now comes the fun part: transforming those simple ingredients into a golden, crunchy batch of irresistible vanilla nut granola. First, by following these easy steps, you’ll not only create a delicious treat but also fill your kitchen with an absolutely heavenly aroma. Then, as you move through the process, you’ll see how straightforward and rewarding homemade granola can be. So, without further ado, let’s jump right in and get started!
Step 1: Prepping the Ingredients
To begin, start by gathering everything you need—because, honestly, this simple step makes the entire process so much smoother. Additionally, having all your ingredients and tools ready beforehand ensures that you won’t have to stop midway, making your granola-making experience far more enjoyable and efficient.
- Measure your dry ingredients. Combine oats, chopped nuts, and any seeds you’re using in a large mixing bowl. Give it a quick toss to evenly distribute.
- Prepare the wet ingredients. In a separate bowl or measuring cup, mix your sweetener (like maple syrup or honey), oil, vanilla extract, and a pinch of salt. Whisk it all together until smooth.
💡 Pro Tip: Preheat your oven to 325°F (163°C) and line a large baking sheet with parchment paper for easy cleanup.
Step 2: Mixing the Dry and Wet Ingredients
Here’s where the magic starts happening:
- Pour the wet mixture over the dry ingredients.
- Stir well. Use a spatula to ensure every oat and nut is coated. This step is key for achieving that beautiful, caramelized crunch.
Don’t rush—spend an extra minute or two mixing to make sure no dry spots remain.
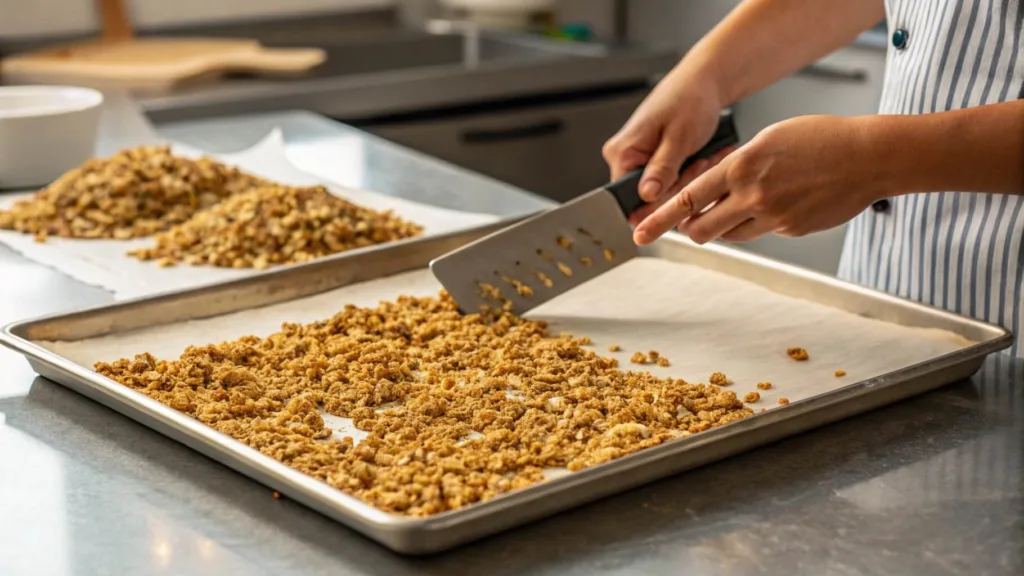
Step 3: Baking to Golden Perfection
- Spread the granola evenly on the prepared baking sheet. Use the back of your spatula to press it into a thin, even layer. (This helps it form those irresistible clusters!)
- Bake for 20–25 minutes, stirring halfway through to ensure even baking.
💡 Pro Tip: Keep an eye on it during the last few minutes. Granola can go from golden to burnt faster than you’d think!
Step 4: Cooling and Storing Your Vanilla Nut Granola Recipe
- Cool completely on the baking sheet before breaking it into clusters. This is the secret to keeping your granola crispy and clumpy.
- Transfer to an airtight container. Your granola will stay fresh for up to 2 weeks at room temperature—or even longer in the freezer.
Quick Troubleshooting Tips
- If the granola feels too soft: Pop it back in the oven for 5–7 more minutes, keeping a close watch.
- If it’s too sweet or oily: Adjust the ratios next time—it’s all about finding your perfect balance.
Pro Tips for the Best Vanilla Nut Granola Recipe
Making granola is straightforward; however, with just a few clever pro tips, you can effortlessly elevate your vanilla nut granola from simply good to absolutely crave-worthy. First, by incorporating these easy tricks, you’ll notice a big difference in flavor and texture. Then, as you perfect these techniques, your granola will become a true showstopper. So, let’s dive right in and uncover the secrets that will take your granola to the next level. Trust me, these tips are total game-changers!
Tip 1: How to Avoid Overbaking Your Vanilla Nut Granola Recipe
Granola’s golden-brown perfection can be tricky to nail. Here’s the trick:
- Bake low and slow. Stick to 325°F (163°C) and resist the urge to crank up the heat—it needs time to crisp up without burning.
- Know when it’s done. The granola will still feel soft when you pull it out of the oven but will harden as it cools. A slight golden hue is your cue to stop baking.
💡 Pro Tip: If you love extra clumps, press the granola down with your spatula after the final stir and before returning it to the oven.
Tip 2: Achieving the Perfect Crunch
Crunchy granola is the goal, right? Here’s how to make sure yours hits that sweet spot:
- Balance wet and dry ingredients. Too much liquid makes it soggy; too little, and it won’t bind together. Stick to the ingredient ratios for foolproof results.
- Use oil wisely. Coconut oil or light olive oil adds richness without overpowering the vanilla. A little goes a long way!
- Don’t rush the cooling process. Seriously, let it cool completely before you touch it. Patience = perfect crunch.
Tip 3: Flavor Combinations to Try
Ready to switch things up? Here are some fun ways to tweak this recipe while keeping vanilla as the star:
- Vanilla Almond Joy: Add shredded coconut and mini chocolate chips after baking for a candy-inspired twist.
- Cinnamon Vanilla Crunch: Sprinkle cinnamon and nutmeg into the mix before baking for cozy vibes.
- Berry Bliss Granola: Toss in dried blueberries or raspberries for a tart and sweet balance.
💡 Pro Tip: You can double the vanilla extract if you’re a superfan of that rich, aromatic flavor.
Tip 4: Storage Secrets for Long-Lasting Freshness
Homemade granola can lose its crunch if not stored properly. Here’s how to keep it fresh:
- Store in an airtight container at room temperature for up to 2 weeks.
- Freeze it! Yep, granola freezes beautifully. Pop it into a freezer-safe bag, and it’ll last for 2–3 months. Thaw at room temp, and you’re good to go.
Ways to Enjoy Vanilla Nut Granola Recipe
This vanilla nut granola isn’t just a snack; in fact, it’s truly a culinary multitasker! Moreover, there are so many creative and downright delicious ways to use your homemade granola. From breakfast staples that effortlessly kickstart your day to dessert-worthy treats that completely satisfy your sweet tooth, you’ll quickly realize that, honestly, having a stash on hand at all times is practically essential.
Breakfast Boosters
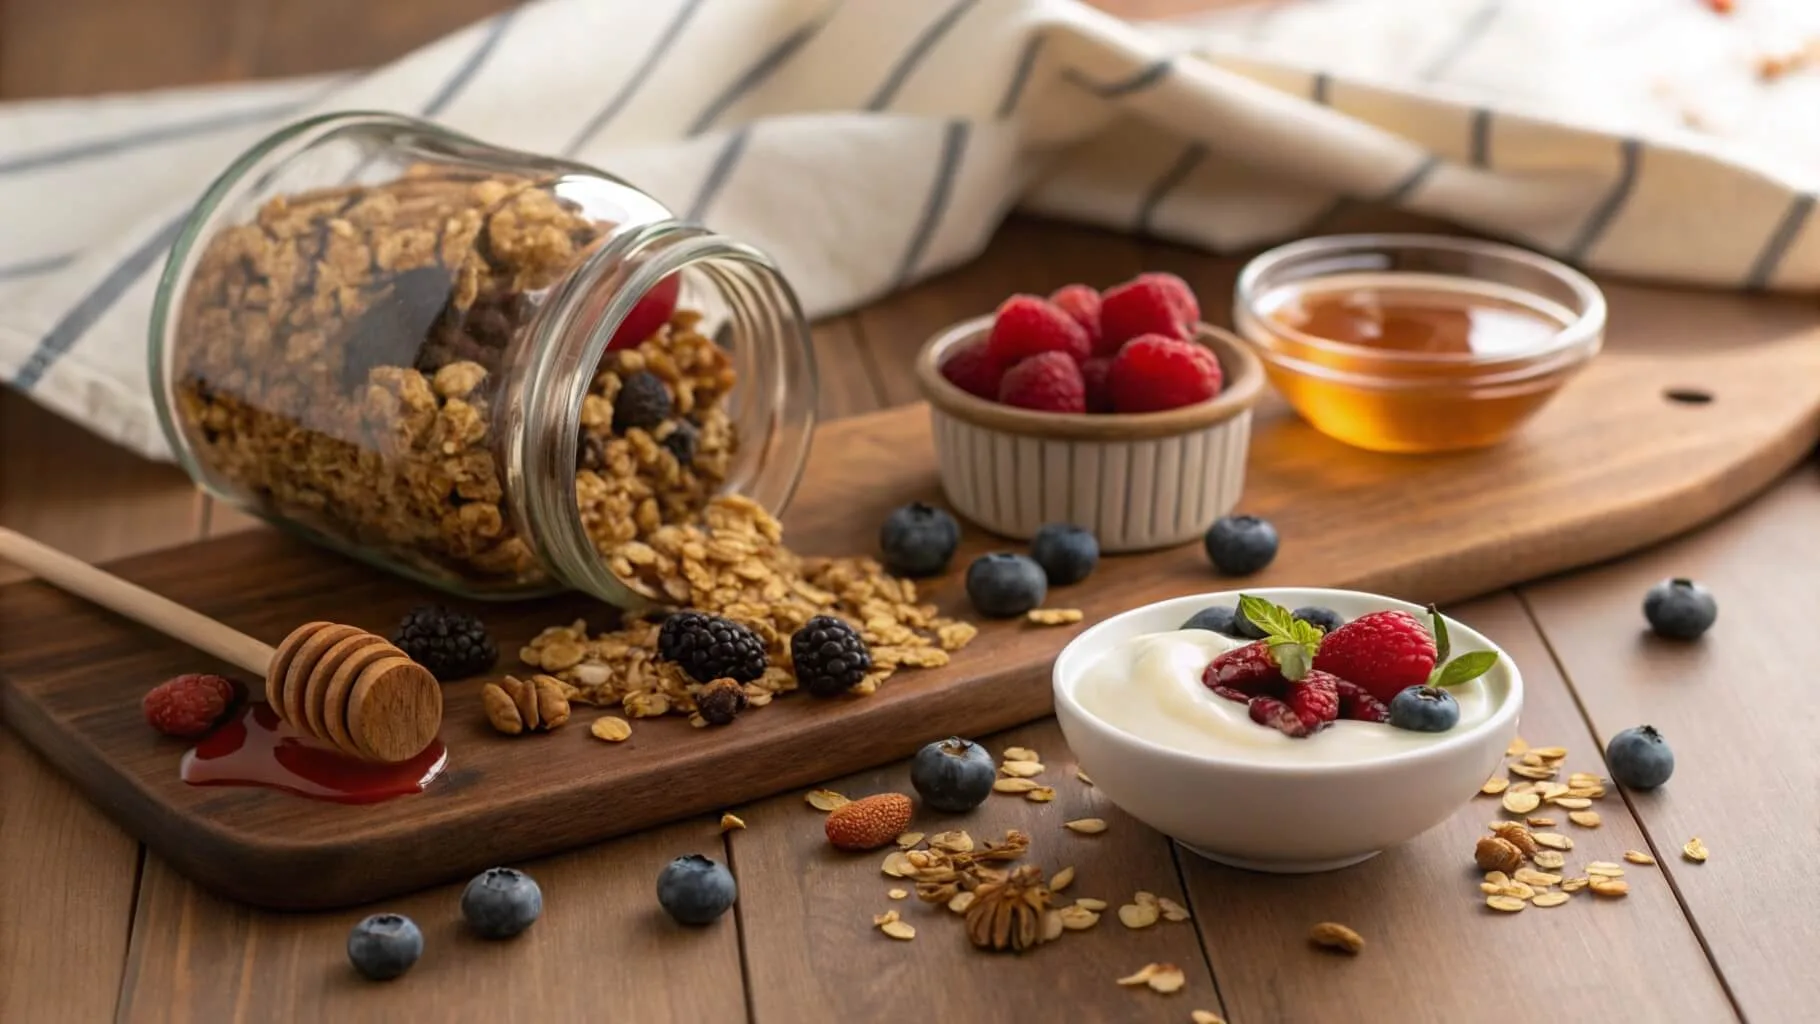
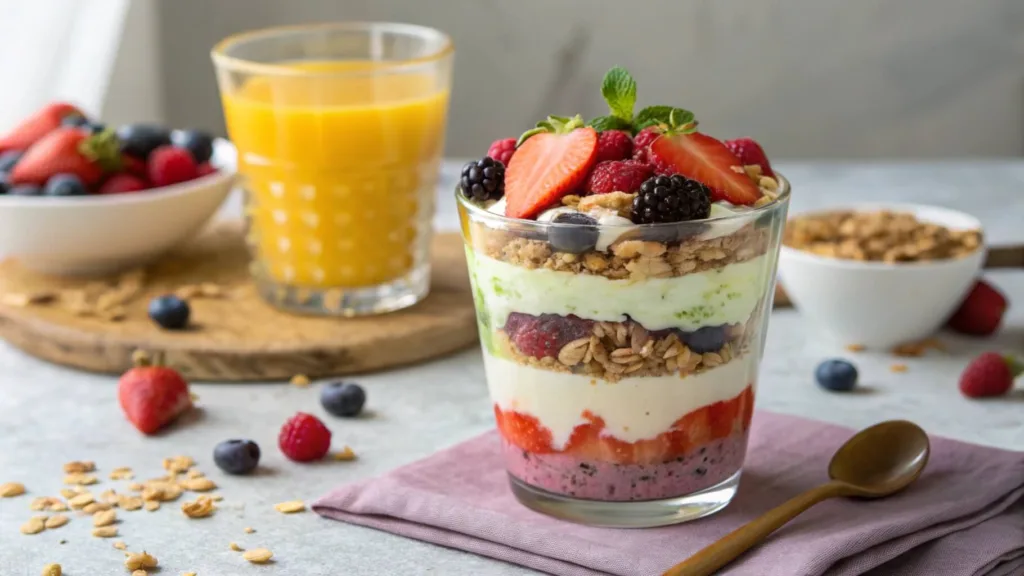
- Topping for Yogurt or Smoothie Bowls
First and foremost, nothing beats the satisfying crunch of granola sprinkled over creamy Greek yogurt or a fruity smoothie bowl. Moreover, for an added burst of flavor and color, consider topping it off with some fresh berries or banana slices.
💡 Pro Tip: For an extra touch of fun and convenience, layer it parfait-style for a portable breakfast that’s not only delicious but also Instagram-worthy. And if you’re looking for another sweet treat idea, check out The Ultimate Guide to Thanksgiving Cookie Recipes for festive dessert inspiration! - Cereal Alternative
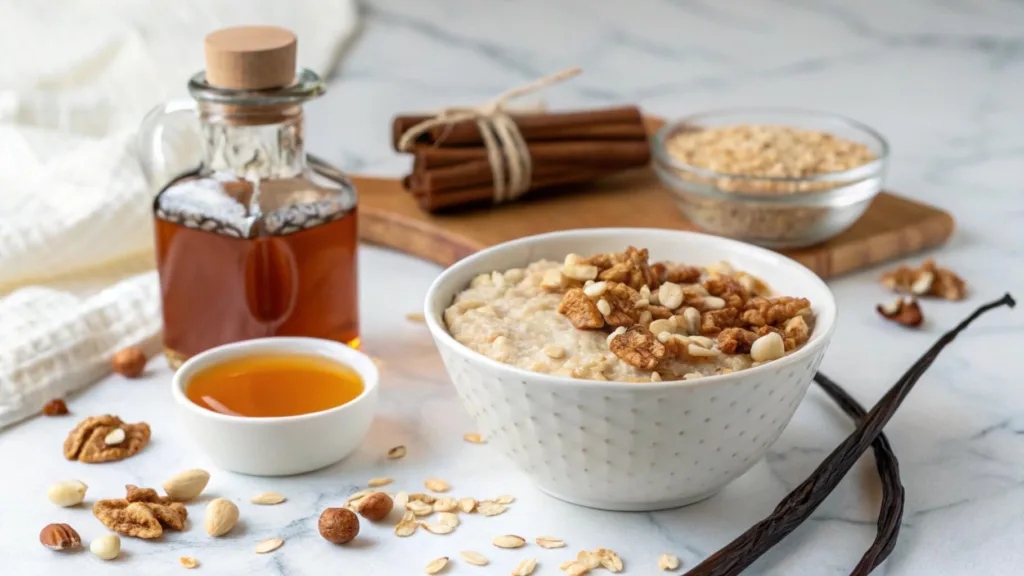
Alternatively, pour milk or your favorite plant-based alternative over a bowl of granola for an effortless, no-cook breakfast. Additionally, this option is hearty, satisfying, and, without a doubt, so much better than sugary boxed cereals. For more savory breakfast ideas, why not try this unique Crab Brulee Recipe? It’s guaranteed to impress! - Oatmeal Upgrade
Lastly, stir granola into hot oatmeal for an added layer of crunch and flavor. In fact, the delightful mix of textures transforms an ordinary bowl of oatmeal into a total game-changer. And if you’re in the mood for a warm, seasonal side dish, take a look at this comforting Sweet Potato Recipe for Thanksgiving—it pairs beautifully with any holiday spread.
Snack-Time Heroes
- Quick Energy Bites
Grab a handful of granola when you’re on the go. It’s a perfect snack to keep in your bag for busy days or post-gym pick-me-ups. - DIY Trail Mix
Mix granola with dried fruit, chocolate chips, and extra nuts for a custom trail mix that’s sweet, salty, and satisfying. - Granola Bars
Press your granola mixture into a baking dish before it cools, let it set, and cut it into bars. Perfect for meal prep or lunchboxes!
Dessert-Worthy Treats
- Ice Cream Topping
Sprinkle granola over vanilla or caramel ice cream for a crunchy, indulgent dessert. Trust me, this is next-level. - Fruit Crisp Shortcut
Use granola as a quick topping for baked fruit like apples or peaches. Pop it in the oven until warm, and you’ve got a 5-minute dessert. - Granola Bark
Spread melted chocolate on a baking sheet, sprinkle it with granola, and let it set. Break it into pieces for a sweet snack that’s as pretty as it is tasty.
Unexpected Uses
- Salad Topping
Yep, granola works on salads too! Use it in place of croutons for a crunchy twist on your greens. - Baking Add-In
Stir granola into muffin or pancake batter for a fun, textured surprise. - Garnish for Soups
Add a pinch of granola on creamy soups like butternut squash or tomato for a contrasting crunch.
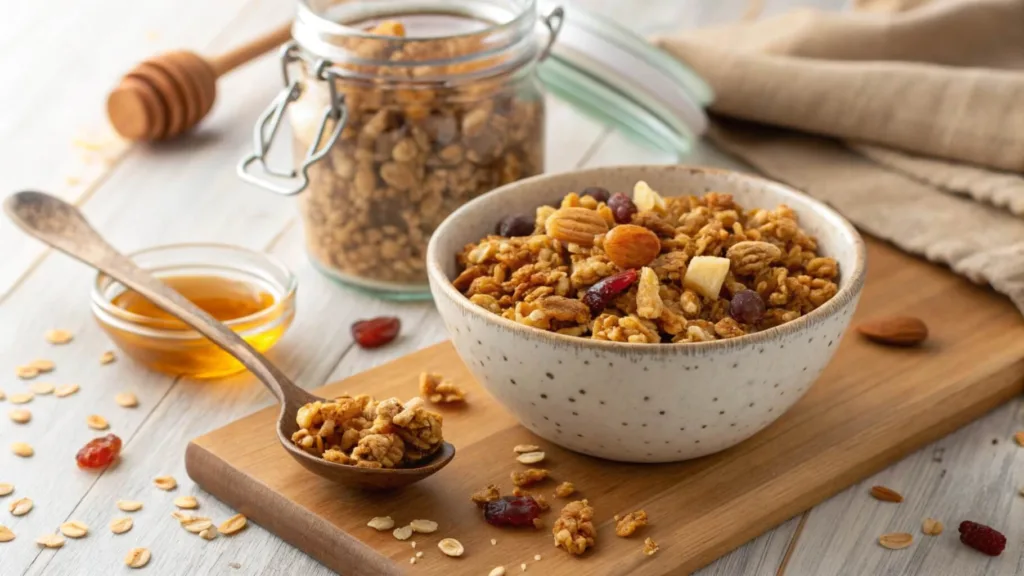
Why Vanilla Nut Granola Recipe Will Be Your New Favorite
Whether you’re enjoying it straight out of the jar, sprinkling it over yogurt, or even transforming it into a decadent dessert, this vanilla nut granola is, without a doubt, a total game-changer. In fact, not only does it deliver the perfect balance of crunch, sweetness, and warm vanilla flavor, but it’s also practically guaranteed to become a staple in your kitchen. Furthermore, its versatility and irresistible taste make it a treat you’ll keep coming back to. And if you’re curious about the health benefits of oats, one of the main ingredients, check out this informative piece from Harvard T.H. Chan School on why oats are a nutritional powerhouse. Honestly, once you try it, you’ll find yourself reaching for it again and again—and for good reason!
FAQs
1. How Long Does Homemade Vanilla Nut Granola Recipe Last?
Homemade granola can last up to two weeks when stored in an airtight container at room temperature. To extend its shelf life, store it in the freezer for up to three months. Just let it thaw for a few minutes before digging in!
2. Can I Make This Recipe Gluten-Free?
Absolutely! Just make sure to use certified gluten-free oats and check that all other ingredients (like nuts and vanilla extract) are gluten-free. This way, you can enjoy the crunch without worry.
3. What Nuts Work Best in This Recipe?
Any nuts will do, but almonds, pecans, and walnuts are classics for a reason. Want to mix it up? Try cashews or hazelnuts for a unique twist. Be sure to chop them to your preferred size for even baking.
4. Can I Reduce the Sweetness?
Yes! You can cut the sweetener by up to 25% without impacting the recipe’s texture. If you’re using a sweeter add-in, like dried fruit, you might not even notice the reduced sugar.
5. What’s the Secret to Big Granola Clusters?
The key to clusters is pressing the mixture down firmly on the baking sheet before baking and avoiding too much stirring during the process. Let it cool completely before breaking it into pieces for those chunky, satisfying bites.
6. Can I Make Vanilla Nut Granola Recipe Vegan?
Definitely! Swap out honey for a vegan-friendly sweetener like maple syrup or agave nectar, and use a plant-based oil like coconut oil. The flavor will be just as amazing.
Conclusion: Why This Vanilla Nut Granola Recipe Will Be Your Favorite
Let’s face it: there’s truly nothing quite like the satisfaction that comes with homemade granola. Not only does this vanilla nut granola recipe bring together the warmth of vanilla, the crunch of perfectly toasted oats and nuts, and just the right touch of sweetness to make every bite irresistible, but it also manages to do all of this with minimal effort. Whether you’re enjoying it for breakfast, as a quick snack, or even as a dessert topping, this recipe is, without a doubt, a keeper.
And the best part? It’s incredibly versatile and entirely customizable to suit your preferences. In fact, you can effortlessly tweak it to match your taste buds, accommodate dietary needs, or even reflect seasonal flavors. Furthermore, once you experience the fresh, wholesome goodness of homemade granola, you’ll never look at store-bought options the same way again.
So, without further ado, it’s time to grab your oats, preheat the oven, and get baking. Trust me, your future self will thank you every single time you reach for a crunchy, flavorful handful. Happy granola-making!